When clutter takes over your desk space, it can be difficult to get things done quickly, often causing stress or a creative block. While it is tempting to simply shove clutter to the side for a new project, you’ll benefit more by developing a permanent method! Here are five ways to cure yourself of messy habits and maximize storage space in your home office:
(As an added bonus, we’ll even show you our favorite decor ideas and DreamBox accessories for achieving the ideal workflow inside your DreamBox.)
Prioritize Clear Storage
It’s easy for important items to get lost among oversized bins that get stacked into the corner. Instead, try using transparent totes so you always know where everything is (and exactly what you’re running low on). This will help you avoid double-buying and developing excess clutter that doesn’t have a designated home.

Photo courtesy of Happy Ever Crafter
Visible InView Totes allow you to easily locate your supplies, creating a workflow that is both organized and visually refreshing. If you can see it, you’ll always remember where you put it.
Invest In Drawer Organizers
There’s no denying we’ve all got a drawer full of random things that don’t make sense together. In order to keep even the smallest knick-knacks in their designated place, it’s best to use drawer organizers.

Photo courtesy of TL Yarn Crafts
Whether you’re crafting, sewing, or just trying to organize your paperclips and pencils, you’ll want to try out the Plastic Notions Tray Inserts when organizing your drawers. On that same note, a Paper Organizer is a dream come true for your important documents. Not only will it sort papers according to your workflow, but it also frees up space on your table for more important projects.

Photo courtesy of Jen Hadfield
You can also keep pens and pencils on display with a pencil holder or the Tool Cubby so you know exactly where to look when you need just the right color.

Photo courtesy of Sarah Style Designs
Keep Bins & Supplies Off The Floor
If your workspace is too tight and crowded, try out vertical storage organization for a change. Often enough, bins and boxes on the floor take up too much space, eventually creating a maze you have to navigate just to find your desk. Having vertical storage instead means you won’t ever have to give up precious floor space again!

Photo courtesy of Lia Griffith
To achieve this, you can incorporate a DreamBox into any room or even use the Create Room Cubby, ideal for tighter spaces with its unique hideaway design. Moving your supplies off the floor also makes it easier to clean your space and switch around furniture as needed.
Create Zones & Labels For Each Project
Which types of projects are you doing the most often? Decide this first so you can organize your supplies according to what you need at any given time. This way, you can refer to one general spot for what you need instead of several different drawers and bins. Your most-used items will go at desk height, between your shoulder and waist height, where you can best access them. Heavier items like machines and bins should always go at the bottom of your layout so they don’t fall or hurt you if you drop them.

Photo courtesy of Modern Maker
To choose which zones will fit best in your workflow, draft up a list of the projects you’ve done in the last few months, as well as the projects you have in mind for the future. Identify 3 of the most common projects on your plate and create zones for each of them, the first being your most frequently used. Once you’ve figured out your most essential zones, break them down into smaller categories for each drawer based on what it is and how often you’ll use it! Here’s what that might look like for someone who wants to combine a home office and a craft space:
Zone 1: Office Supplies
- Sticky Notes- Post-its, tabs, stickers
- Tools- Scissors, staplers, hole punchers
- Paper- Calendars, planners, printing paper, notepads, schedules
- Writing Tools- Pens, highlighters, markers, Sharpies
Zone 2: Scrapbooking Supplies
- Paper- Cardstock, patterned paper, page protectors, photos, sticker books
- Tools- Weeders, scrapers, scissors, paper trimmer
- Stamps & Inks- clear stamps, rubber stamps
- Embellishments- Washi tape, glitter, rhinestones, flowers
- Glue- Liquid glue, glue pens, foam tape, double-sided adhesives

Photo courtesy of Hello Wonderful
If there are extra or seasonal supplies that you don’t see yourself using in the next few months, put them in an area away from your important supplies to preserve your ideal workflow. If you know you haven’t used them in a long-time, and you won’t anytime soon, you’ll benefit most by kicking them to the curb or donating them to a friend.

Photo courtesy of Meike Schneider
Creating labels for each of your drawers and bins is essential to keeping your zones organized! Label your drawers according to what belongs in each of your three zones. To help preserve this zone, make it a personal rule that nothing else will go inside that drawer other than what is written on the label.

Photo courtesy of Meike Schneider
Expand Your Tablespace
Here’s where extra table space really comes in handy. If you prefer to organize by zones, your best shot at staying organized is to also have a designated spot on your desk for each of your projects, machines, and devices.

Photo courtesy of Avanti Morocha
For those who already own the DreamBox and are looking expand their layout, the Cubby or the Side Tables give plenty of room for computers and printing machines. Just like your storage space, you should keep your table space organized into zones. This way, you’ll never have to worry about moving supplies out of your way that don’t belong in that zone! If you have large projects that take up a great deal of space, consider giving those projects their own designated table to ensure you always have enough room to complete it.
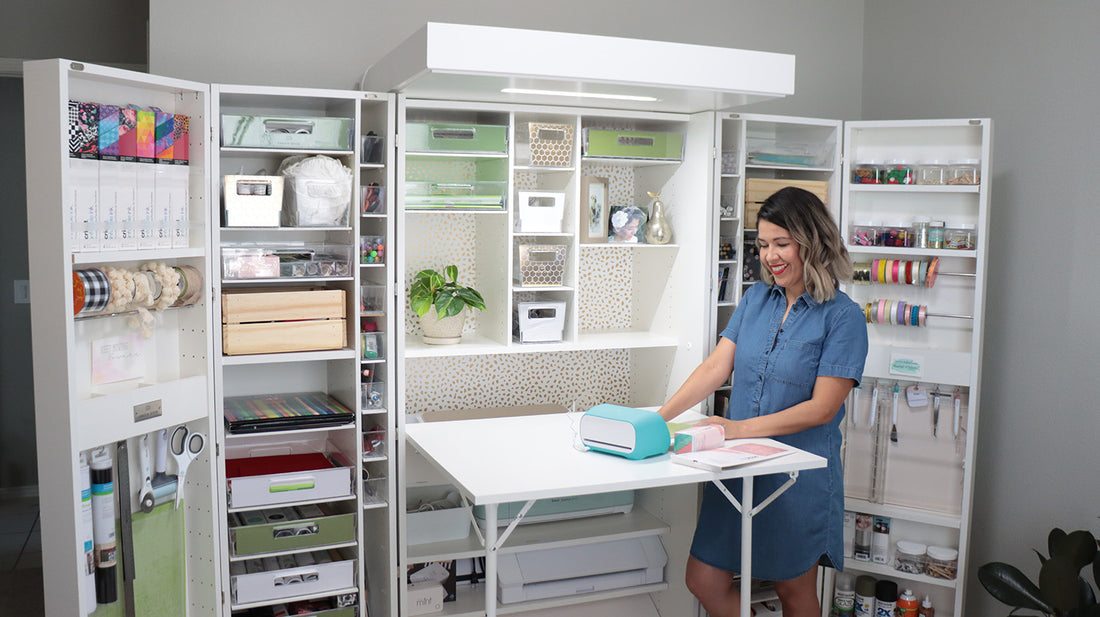
Bonus Tip: Have Fun With It!
Looking for a stylish and productive workspace? The most important tip is to make it your own. Find decor that speaks to you personally, motivating you to use your new space and keep it organized. This may involve surrounding yourself with bright, vivid colors that inspire you and fuel your creative energy. To help your space feel more natural and inviting, try adding plants and flowers!

Photo courtesy of My Shiny Studio
Or maybe, you’re looking for a modern, clean desk space to keep yourself organized and focused on your work? To do this, stick to a classic color palette with neutrals that encourage calm and quiet.

Photo courtesy of NEAT Method
Whatever your favorite style is, go for decor that keeps you motivated and driven to succeed! You’d be surprised just how much your productivity increases when you have a space that you love working in.