Craft Room Spring Cleaning Tips
Spring is here! Do you know what that means? It's time for spring cleaning! Spring cleaning can be so bitter sweet. It feels like such a daunting task, but we always feel so much better when we are done. Getting started is the hardest part, so to help, we have created a “Spring Cleaning Guide” with 6 simple steps to get your craft room back into ideal condition.
If you are in the very beginning stages and still trying to get a craft space set up, be sure to go check out our Create Room Journey, linked here. Step four is specifically focused on getting organized and starting out.
Step 1: Pull Everything Out
When getting organized, the best place to start is having a clear understanding of what you are working with. That’s why the first step in our craft room spring cleaning guide is to pull everything out. This may sound crazy, but trust the process! If you have a DreamBox, you likely stay pretty organized, but we still recommend doing a major inventory check at least once a year! Don't worry, step four will help you move back in, more organized than ever before.
(IMG by Hello Wonderful)
Here are some tips that might help you with this step.
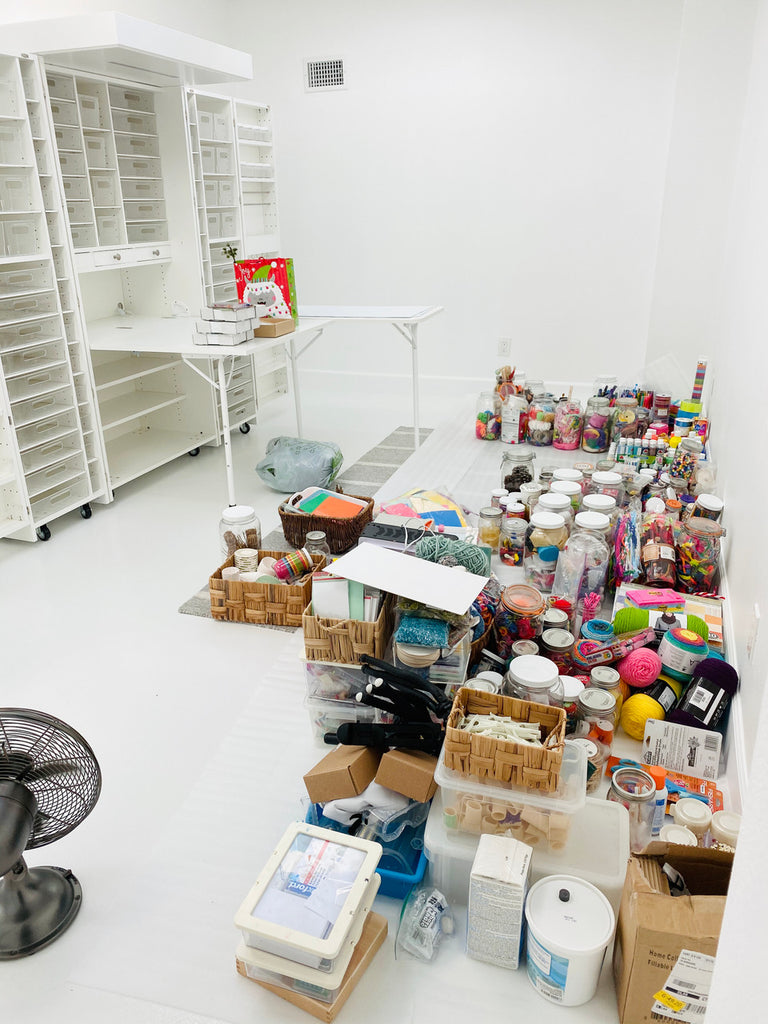
Wherever possible clear a large space (preferably on a floor). This does not necessarily have to be in your craft room. Place all your craft items in this large area, so you can see exactly what you have.
Be sure to check and gather supplies from every little drawer and closet you might have tucked things in.

(IMG by April B.)
Step 2: Clean Your Space
Once you've pulled everything out, take advantage of this perfect opportunity to do some deep cleaning. If you have a DreamBox, your shelves and totes that are normally filled with supplies most likely do not get cleaned often. Other important items that you will want to be sure to clean are your craft machines. As much as we use them, sewing, Cricut, or Silhouette machines, etc. can still collect dust! Give them a wipe down with a damp towel before putting them back into place.

Here are some tips that might help you with this step.
You can use a vacuum hose in your drawers and shelves to help collect the dirt quickly and easily. Use wipes, paper towels and cleaning sprays to clean your spaces.Same as dusting a standard door or cabinet. A mild cleaner with cloth, or magic eraser for stubborn marks works great You will feel so good when you clean the dried paint and glue from off your desk!
Step 3: Sort Into Piles
The third step is to return to the ominous pile of supplies on the floor. Begin sorting your supplies into piles. This can feel super overwhelming, but don’t worry! Just take one thing at a time. You can plan your piles ahead of time, or create piles as you go depending on the supplies you see you have.
Here are some tips that might help you with this step.
Some ideas to categorize your piles could be based on craft type. You could group all your supplies for a sewing project in one pile, and group all your Cricut craft supplies in another. Another way to categorize is on supply type. That would include putting all your pens in one pile, fabric in another, paint in another, etc. A final idea to categorize your supplies could be based on size. Small supplies can get easily lost, but if you keep your small supplies together and use proper organizational tools, you can easily keep up with them.

(IMG by Hello Wonderful)
Step 4: Donate or Retire
Be sure to include a “to donate” pile and “to retire” pile. This is an incredibly important step! Getting rid of supplies can be hard, but it is so helpful in simplifying and organizing your creative space. You will be so happy you did it.

Here are some tips that might help you with this step.
If you are hesitant to donate or retire supplies because you wonder “what if you will use it in the future?” ask yourself if you have used it in the past year. Typically, if you haven’t used it in a year, you won’t use it in the future.
If you are still hesitant, set aside a pile of things to potentially use in the future and set a deadline (ie. 3 months, or 6 months). When the deadline comes around, any supplies still in that pile need to be donated or retired.
Get rid of duplicates! You don’t necessarily have to throw duplicate supplies away and waste them. You could donate them to a friend, family, local school or nonprofit organization. This not only saves you from unnecessary clutter, but allows you to share your crafting joy with others.
If you are not sure whether “to donate” or “to retire” supplies to the trash, do a quick quality check. If paint, markers or pens are dried or cracked-- retire those to the trash! If supplies are still in good shape but you no longer need them, or have too much of them, you can share them!
Step 5: Find the Right Storage Place
Finding the right storage place is incredibly important. Putting supplies in the wrong place can lead to wasting time, getting frustrated, double buying, or simply not crafting at all. Some of these wrong places can be shelves that are too high up or deep totes where it is difficult to see and access your supplies. It can also be difficult when craft supplies are stored in various drawers all over the house. When you sit down to craft, you never have exactly what you need where you need it. Finding the right storage place is super valuable! Take time with this step, and make sure each decision is right for you.

Here are some tips that might help you with this step.
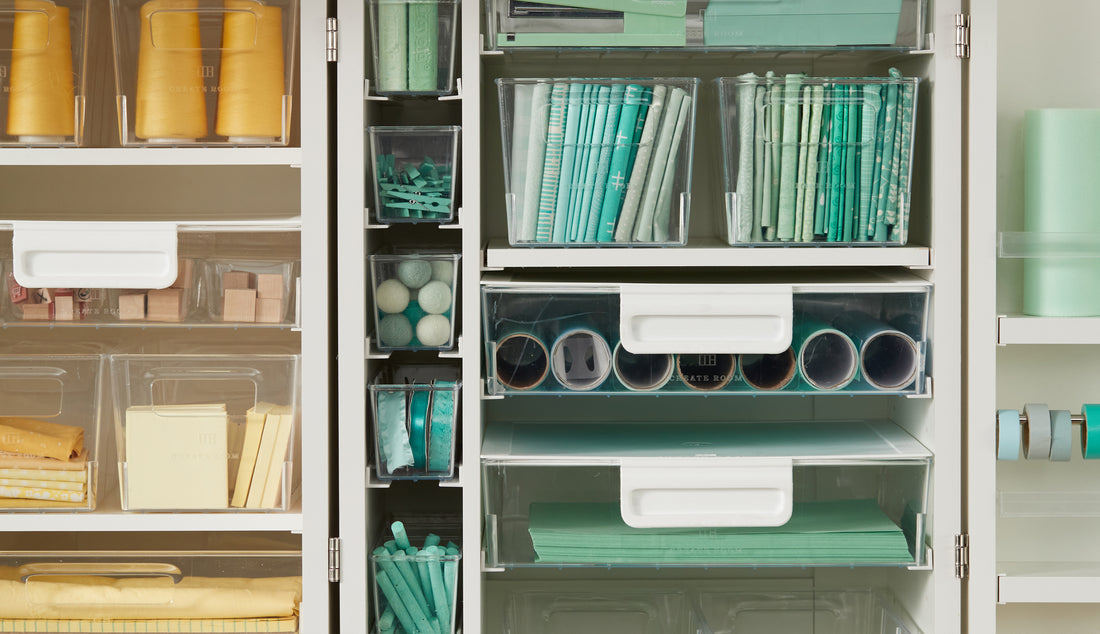
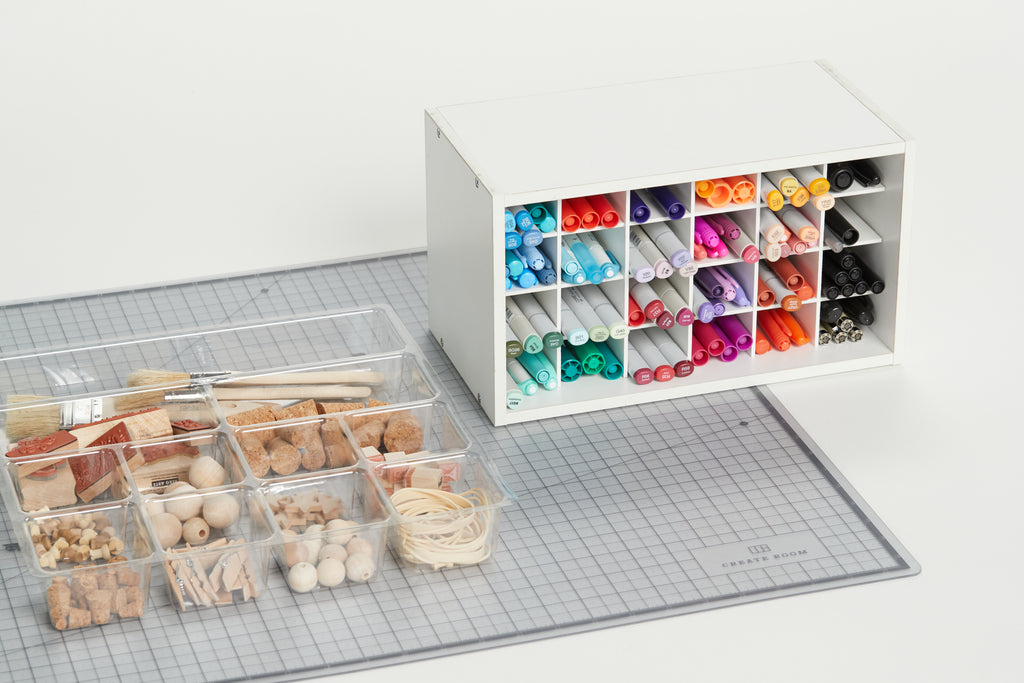
The DreamBox can be the biggest help with this step! The DreamBox was designed by Creators for Creators. It has the perfect dimensions and spaces for your things. There are hooks for Cricut tools, rods for ribbons and washi tapes, and tote dividers to help you organize and keep track of those smaller supplies that are so easily misplaced. We also have clear InView totes, so you can see what you have and easily access it. Keep your totes clear, or cover them up and label them! No matter how you choose to use it, the DreamBox has the right storage place for whatever your craft and supplies might be.
Step 6: Last cleaning touches + Craft
Now, your supplies are officially in the right places and your work space is clean and ready to be used. The final step is to do any additional cleaning that might be necessary. You might need to vacuum the space you pulled all your supplies out to, or clean up paper or pens from creating labels and making good organizational choices. Once those things are cleaned, it’s now time to craft. Cleanliness and organization often helps with creativity and inspiration. Take advantage of your new and improved space.
